Telegram notifications for OPN-Arp
Table of Contents:
Intro
Switching (or at least moving between) firewalls can be hard, especially if you reached 90% of feature-parity and want to go the last mile. Last week, I switched for various reasons from a physical pfSense to a virtualized OPNsense. So far, so good, most of the stuff works instantly, beside: ARPwatch. I know there are some buggy ports out there, but why cracking your head using some buggy “non-native” software if you could use some buggy “native” software? 😉
So I gave OPN-Arp a try. You can use this guide to install it. After a few minutes I have to say: works good! Downside: the notifications. On my old pfSense, I used the integrated Telegram bot functionality to get important firewall notifications like reboots, WAN IP changes, and also ARPwatch messages if a new MAC appears in my network. You’ll get the same functionality with OPN-Arp, but only with E-Mail notifications (which is a mess). So how to enable Telegram notifications?
Initial configuration
Looking at Services -> OPN-Arp -> General, all you have to do is to enable it and select the desired interfaces. After that, have a look at Services -> Monit -> Settings and enable the OPNsense Monit notification engine.
Script preparation
To send Telegram notifications, I went (again) the quick-and-dirty path and wrote some scripts to be executed when OPN-Arp detects a new MAC address entry in /var/log/system/latest.log. Pretty neat. Put the scripts in the folder of your choice on the OPNsense instance.
First script: send_telegram.py
This script is a generic script to just send a message which is provided by you via an argument. Make sure to edit the token and the (group) chat ID (starting with a -).
import requests, argparse, re

# Parse command-line arguments
parser = argparse.ArgumentParser(description='Send Telegram messages.')
parser.add_argument('--message', required=True, help='the message')
args = parser.parse_args()

# send telegram messages
# formatting options: https://core.telegram.org/bots/api#formatting-options
def send_telegram_message(message):
    token = "123yourtoken"
    chat_id = "-123yourchatid"
    url = f'https://api.telegram.org/bot{token}/sendMessage'
    message = re.sub(r'([_*\[\]()~`>#\+\-=|{}.!\\])', r'\\\1', message) # Escape the special characters for MarkdownV2
    try:
        r = requests.post(url, json={'chat_id': chat_id, 'text': message, 'parse_mode': 'MarkdownV2'})
    except requests.exceptions.Timeout:
        error = "[ send_telegram_message ] exception: timeout, error: \n" + r.text
        raise Exception(error)
    except requests.exceptions.TooManyRedirects:
        error = "[ send_telegram_message ] exception: too many redirects, error: \n" + r.text
        raise Exception(error)
    except requests.exceptions.RequestException as e:
        error = "[ send_telegram_message ] exception: generic, error: \n" + r.text
        raise Exception(error)
    if r.status_code == 200:
        return r.text
    else:
        error = "[ send_telegram_message ] response code was not '200', error: \n" + r.text
        raise Exception(error)

send_telegram_message(args.message)
You can test it by executing python3 send_telegram.py --message "just a test".
Second script: monit_mac-pair.sh
This script is OPN-Arp specific and gets executed when the respective log entry gets recognized by Monit. Basically it parses the MONIT_DESCRIPTION environment variable which is present when Monit triggers an event, and then executes the send_telegram.py script we had before. Make sure to enter the correct path, put the script in your desired OPNsense folder and make it executable via chmod +x monit_mac-pair.sh.
#!/usr/local/bin/bash

printf -v OUTPUT "$MONIT_DESCRIPTION"

if [[ $OUTPUT =~ "MAC pair" ]]; then
        ip=$(echo $OUTPUT | cut -d '(' -f 2  | cut -d ')' -f 1)
        mac=$(echo $OUTPUT | cut -d '(' -f 2  | cut -d ')' -f 2)
        msg=">>> New device spotted:
MAC:    $mac
IP:         $ip"
        /usr/local/bin/python3 /path/to/send_telegram.py --message "$msg"
else
        title=$MONIT_SERVICE
        msg=$OUTPUT
fi
Monit settings
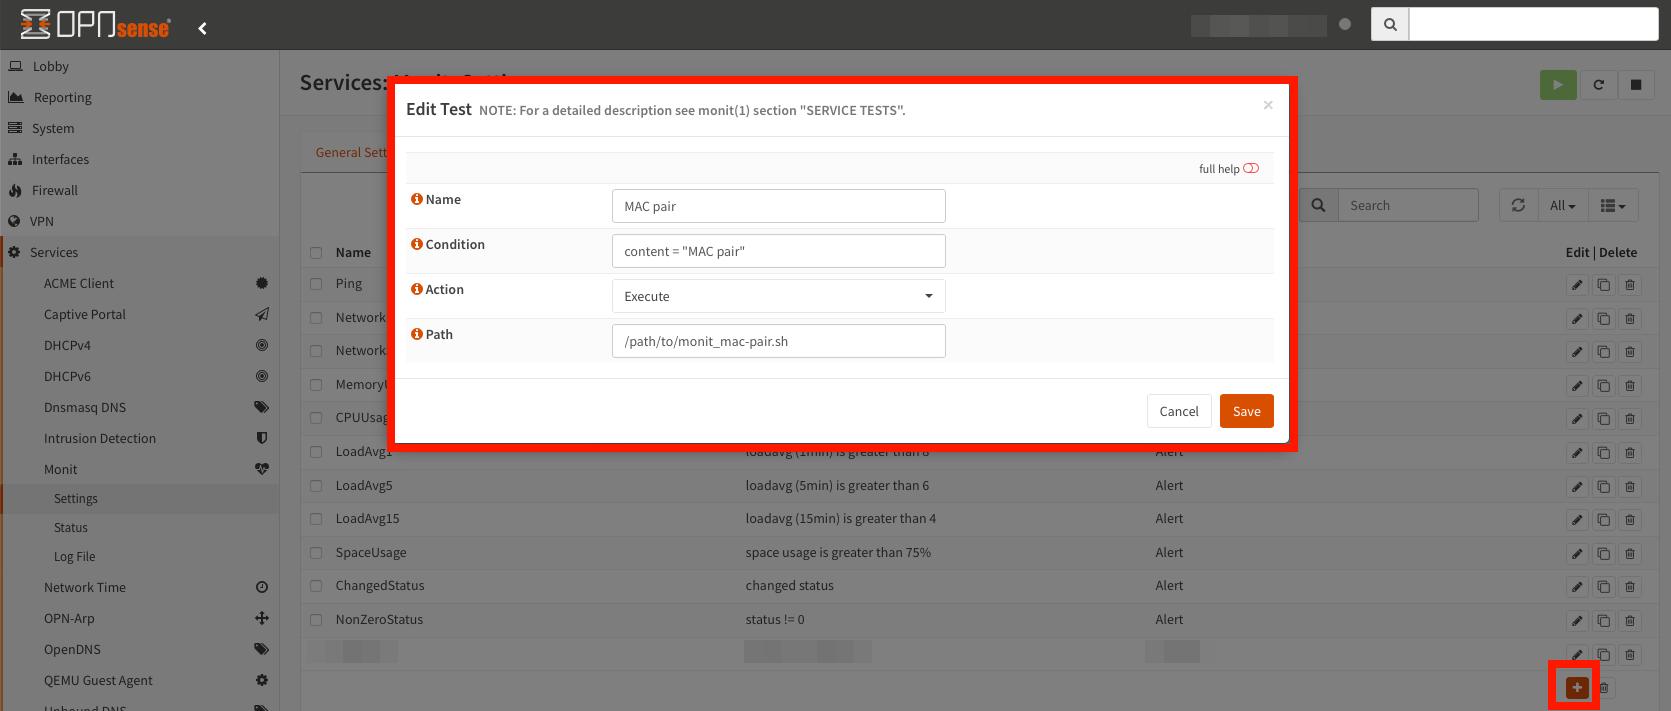
The Monit documentation can be found here. Navigate to Services -> Monit -> Settings -> Service Tests Settings and create a new service test.
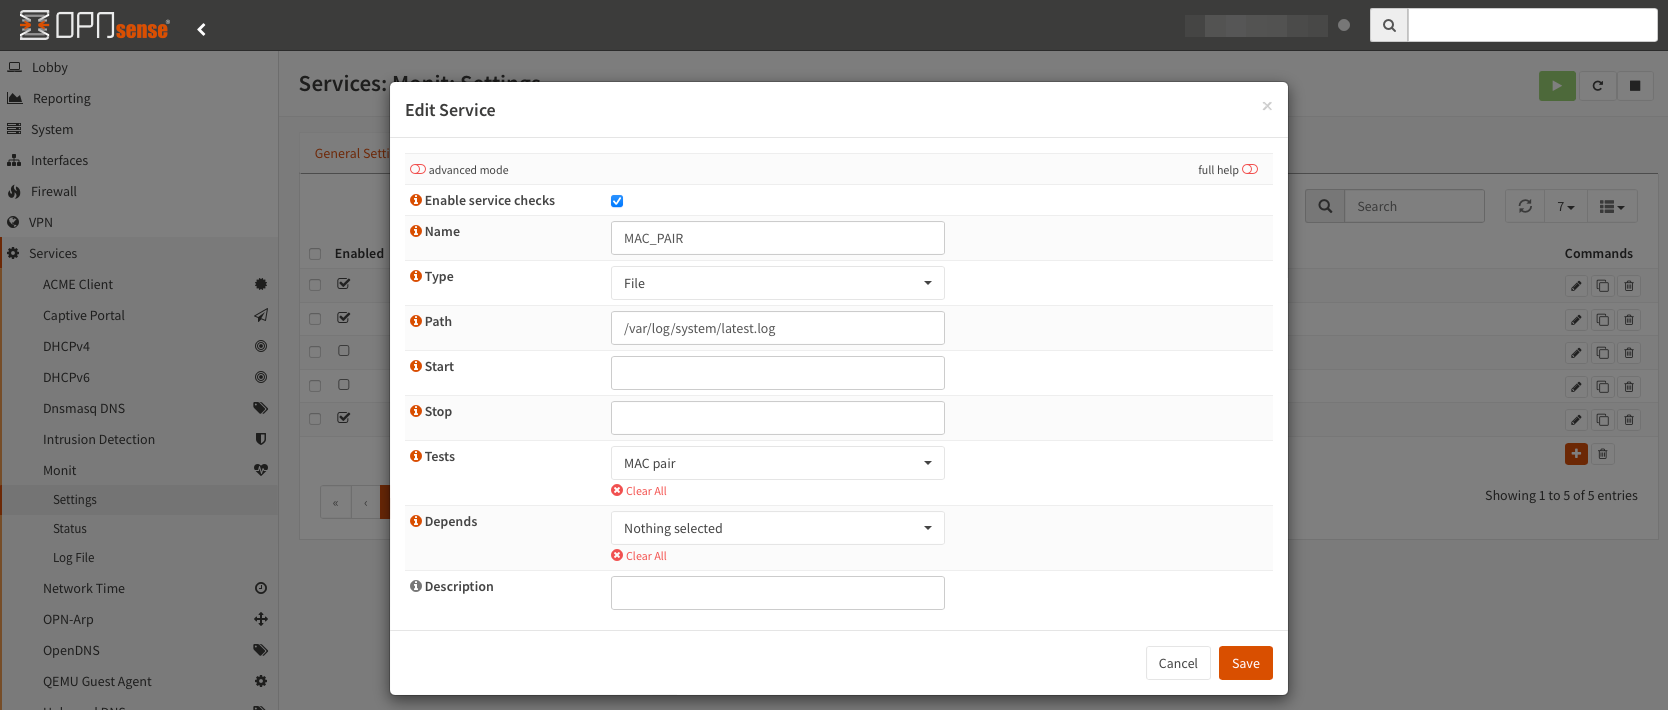
After that, navigate to Services -> Monit -> Settings -> Service Settings, create a new service and use the defined MAC pair test.
Test your setup
If you have entered all values correctly, you can test it by just creating a new log entry in /var/log/system/latest.log using the right format. Execute this command in the OPNsense SSH shell.
echo "<29>1 2022-08-29T20:16:44+03:00 router.home root 59285 - [meta sequenceId=1] New IPv4/MAC pair seen: (10.1.3.22)3a:d1:ee:bc:79:2f" >> /var/log/system/latest.log
You should now have received a Telegram notification about the fake MAC 3a:d1:ee:bc:79:2f. If not, double-check your entries, script permissions and maybe also restart the OPNsense services.
If you like posts like that and want to support me, some sats (see my about page) are highly appreciated 🧡