Migrate RaspiBlitz to VMware
Table of Contents:
- Intro
- seed phrase, passwords, channels, etc.
- create the migration file
- create a new Debian VM and configure it
- attach the SSD to that VM and restore all data from the migration file
Intro
A lot of people are running their own Bitcoin and/or Lightning node at home, using solutions like:
What do (most of these) solutions have in common? They’re widely installed and run on a Raspberry Pi - which is, don’t get me wrong, great for starting in this space. You just buy a Raspberry from elsewhere, flash the SD-Card and you’re good to go.
But.
What if you’ve done that, installed everything on you Raspberry, but see it as a single point of failure (which it definitely is)? What if you’re a business (or soon like to be one) and need to get more into Enterprise features, or just don’t want to have your funds on a Raspberry Pi? There are solutions like kiln (link) or lightning-kube (link) to get your Lightning node running in Kubernetes, but that’s out of scope today. A good talk about that:
Or you just have your own hypervisor at home - like Proxmox, KVM or VMware ESXi and like to install your node on that. Let’s have a look on how to migrate your existing RaspiBlitz on a Raspberry Pi to VMware ESXi or vSphere (using vCenter).
In this tutorial, I’m using VMware vCenter - but the procedure is most likely the same when using ESXi standalone or any other hypervisor.
What do we need?
- a running RaspiBlitz, to create a backup file
- the external SSD used for the RaspiBlitz (or a big enough datastore, which we will come to later)
What do we do?
- check seed phrase, passwords, channels, etc.
- create the RaspiBlitz backup file used for the migration
- create a new Debian VM and configure it
- attach the SSD to that VM and restore all data from the backup file
seed phrase, passwords, channels, etc.
This is important.
Make sure you have written down your seed phrase and your passwords (A, B, C)! In the best case, you won’t need it, but better be safe than sorry. Also have a look at your channels, if you want to be on the safe side: just close them and if you’re done with the migration, open them again on the new “hardware”. You can also save your channel.backup file (using the Static Channel Backup functionality) to your local machine (see a comparison of the files here)
create the migration file
On the RaspiBlitz, navigate to REPAIR > MIGRATION.
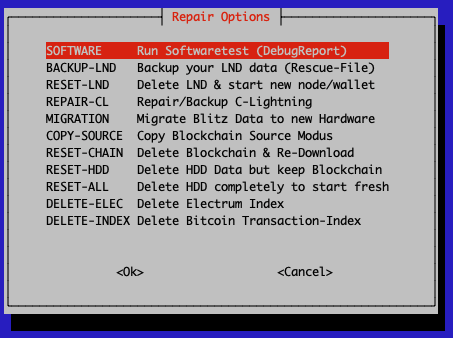
You will see instructions on how to download your migration file, e.g.
*******************************
* DOWNLOAD THE MIGRATION FILE *
*******************************

On your Linux or MacOS Laptop - RUN IN NEW TERMINAL:
scp -r 'bitcoin@10.0.0.21:/mnt/hdd/temp/migration/raspiblitz-*.tar.gz' ./
On Windows use command:
scp -r bitcoin@10.0.0.21:/mnt/hdd/temp/migration/raspiblitz-*.tar.gz .

Use password A to authenticate file transfer.

To check if you downloaded the file correctly:
md5-checksum --> 842a99b123f1f7d631c28f9597c6a0d3
byte-size --> 925668119

Your Lightning node is now stopped. After download press ENTER to shutdown your raspiblitz.
To complete the data migration follow then instructions on the github FAQ.
When using Linux, just copy the scp command to download the file. If you’re on Windows and don’t have scp installed, just use tools like WinSCP to navigate to the /mnt/hdd/temp/migration/ directory and download the .tar.gz file.
I highly advice to check the MD5 sum before moving on!
create a new Debian VM and configure it
Download the Debian ISO image (e.g. from here) and upload it to your datastore.
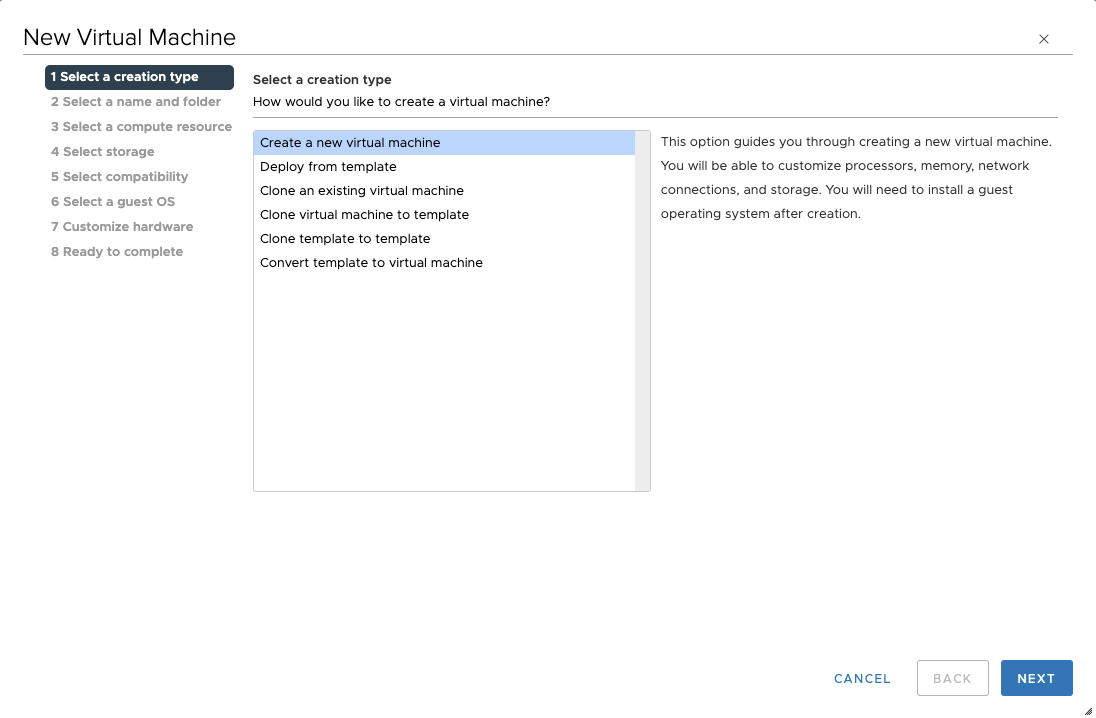
Create a new VM.
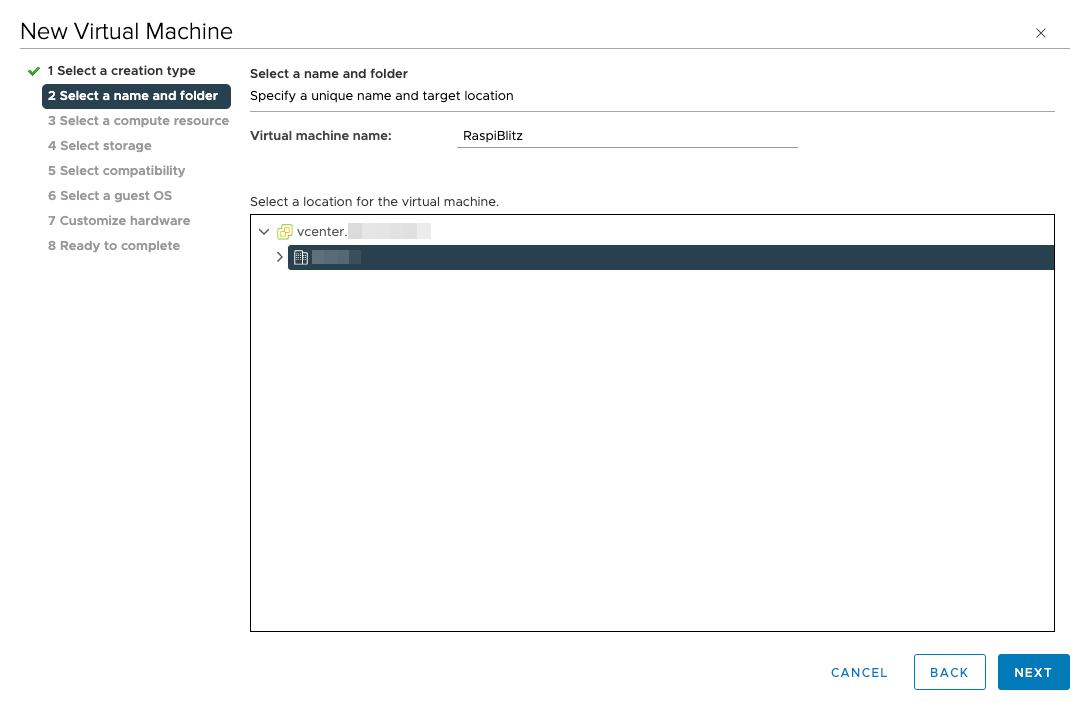
Give it a name and select your location.
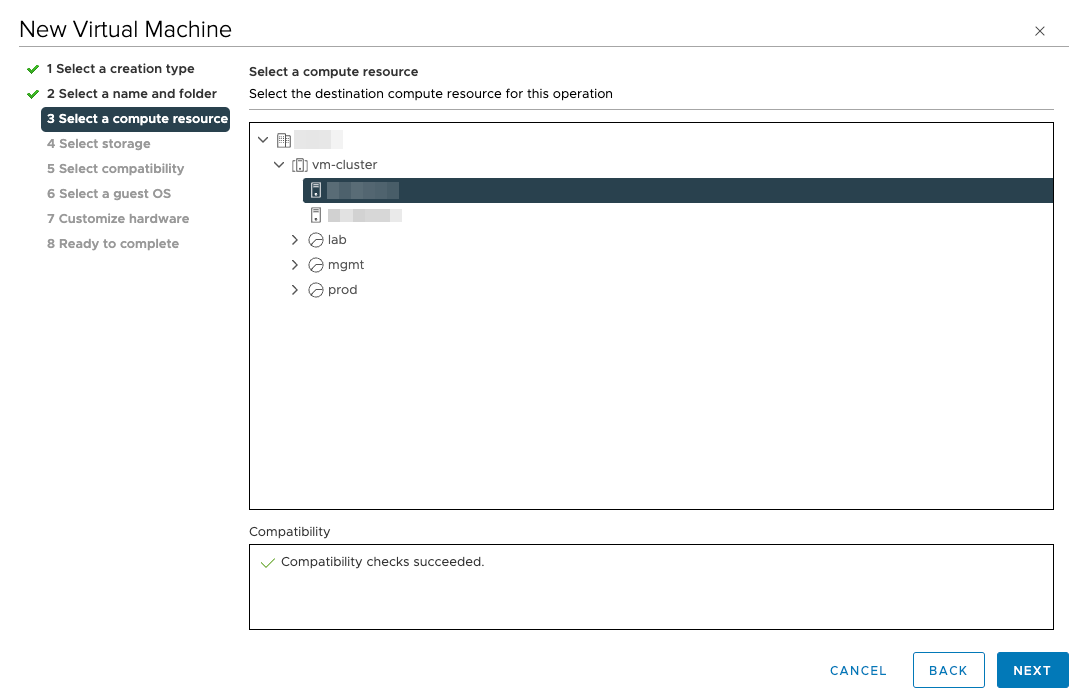
Select your hypervisor or cluster to install the machine on.
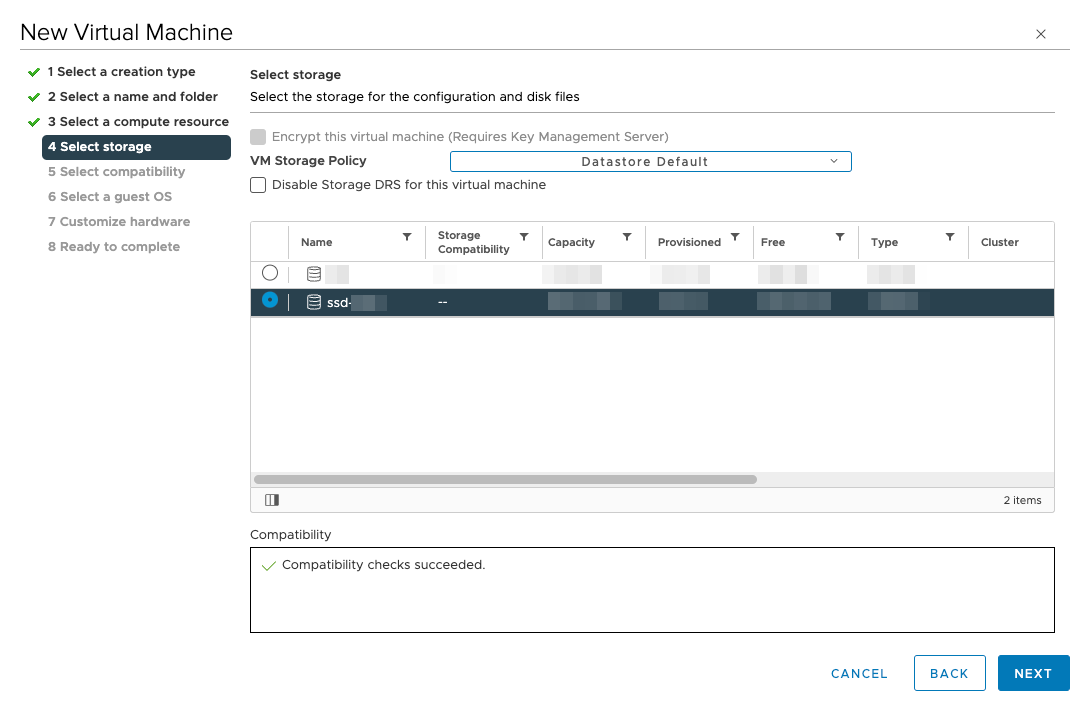
Select your datastore.
Choose virtual machine compatibility. You can leave the default settings.

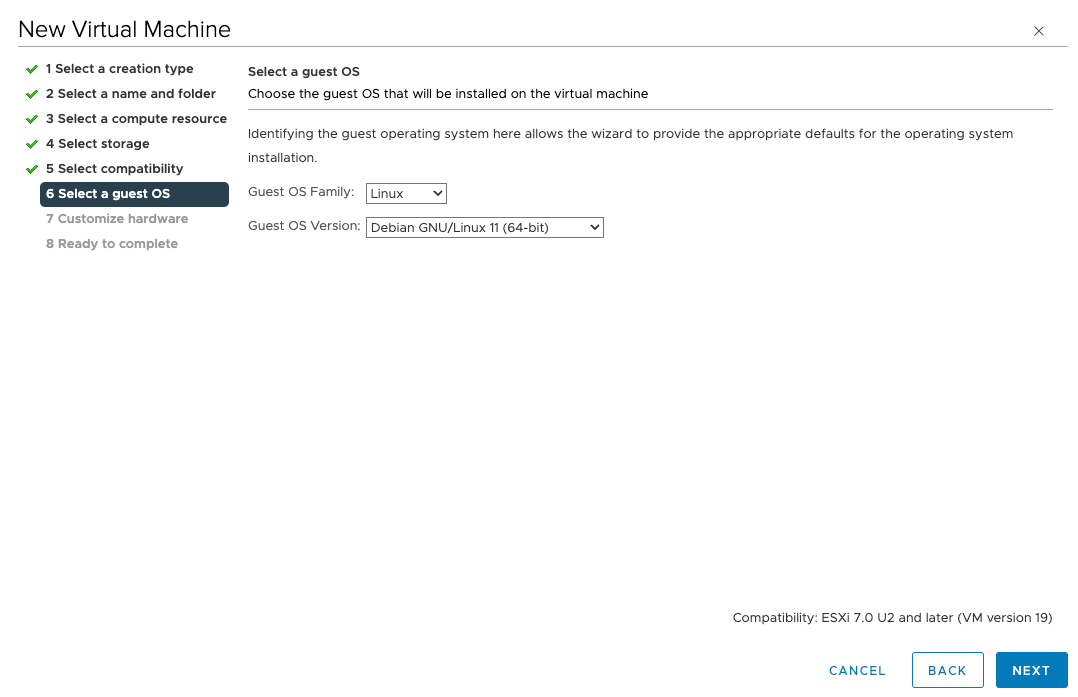
Select the guest OS. Choose
- Linux
- Debian GNU/Linux 11 (64-bit)
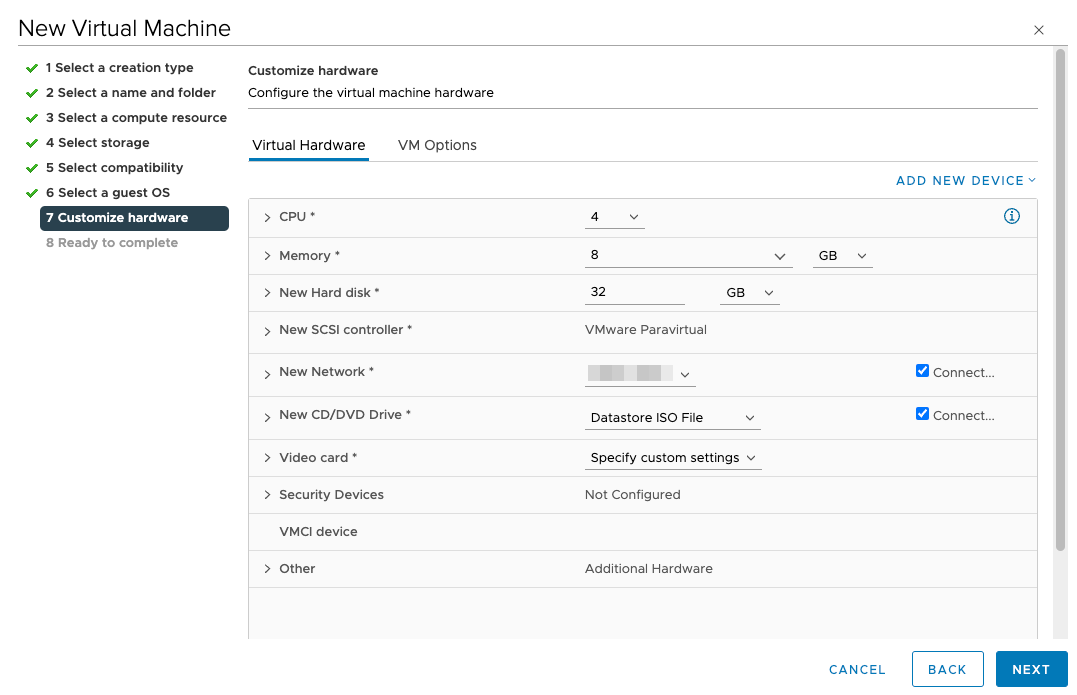
Customize the hardware settings. I would recommend to use at least the same specs as the Raspberry Pi, e.g.
- 4 vCPU
- 8 GB RAM
When in doubt, have a look at the GitHub page.
You can use 32GB hard disk storage (RaspiBlitz doesn’t need that much). Choose your desired network and add the datastore ISO file as hard drive.
Pro tip: if you want to get rid of the external hard drive and your datastore has enough space, add a second (virtual) disk with 1TB storage. You just need to make sure that the second drive is mountet at /mnt/hdd. This makes backup, replication, etc. much easier, but is maybe too much for the typical user 😉
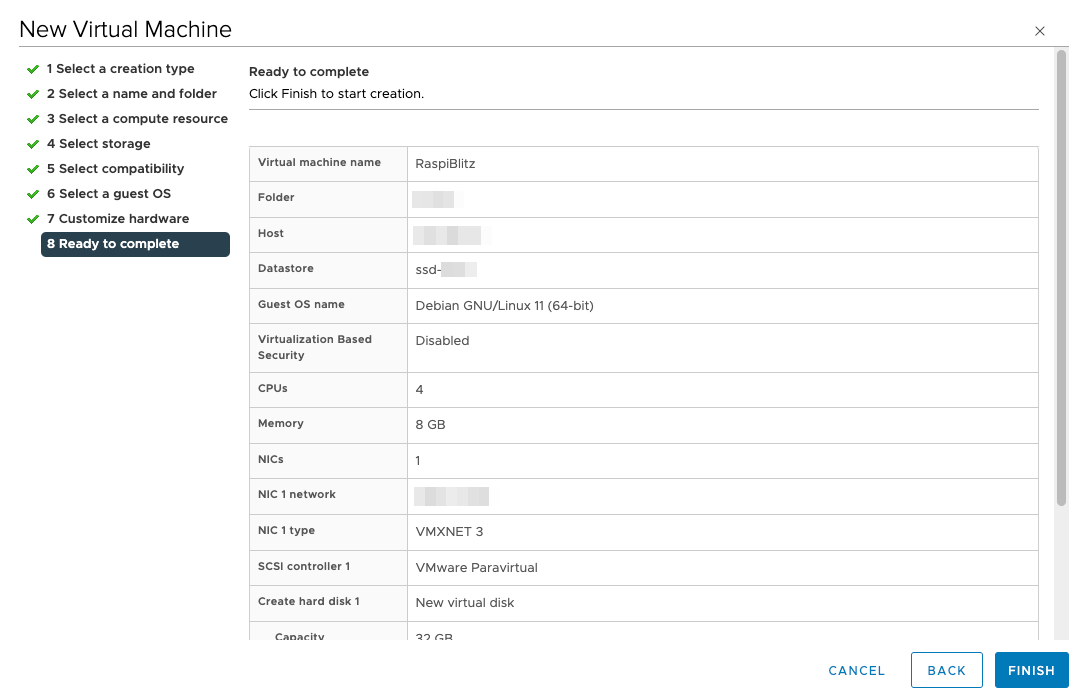
Have again a look at your settings and click FINISH to create the VM.
Now you can start the VM and install Debian as you need. This includes:
- setting language and location
- setting hostname, users and passwords
- setting disk partitioning
- installing SSH server and default utilities
attach the SSD to that VM and restore all data from the migration file
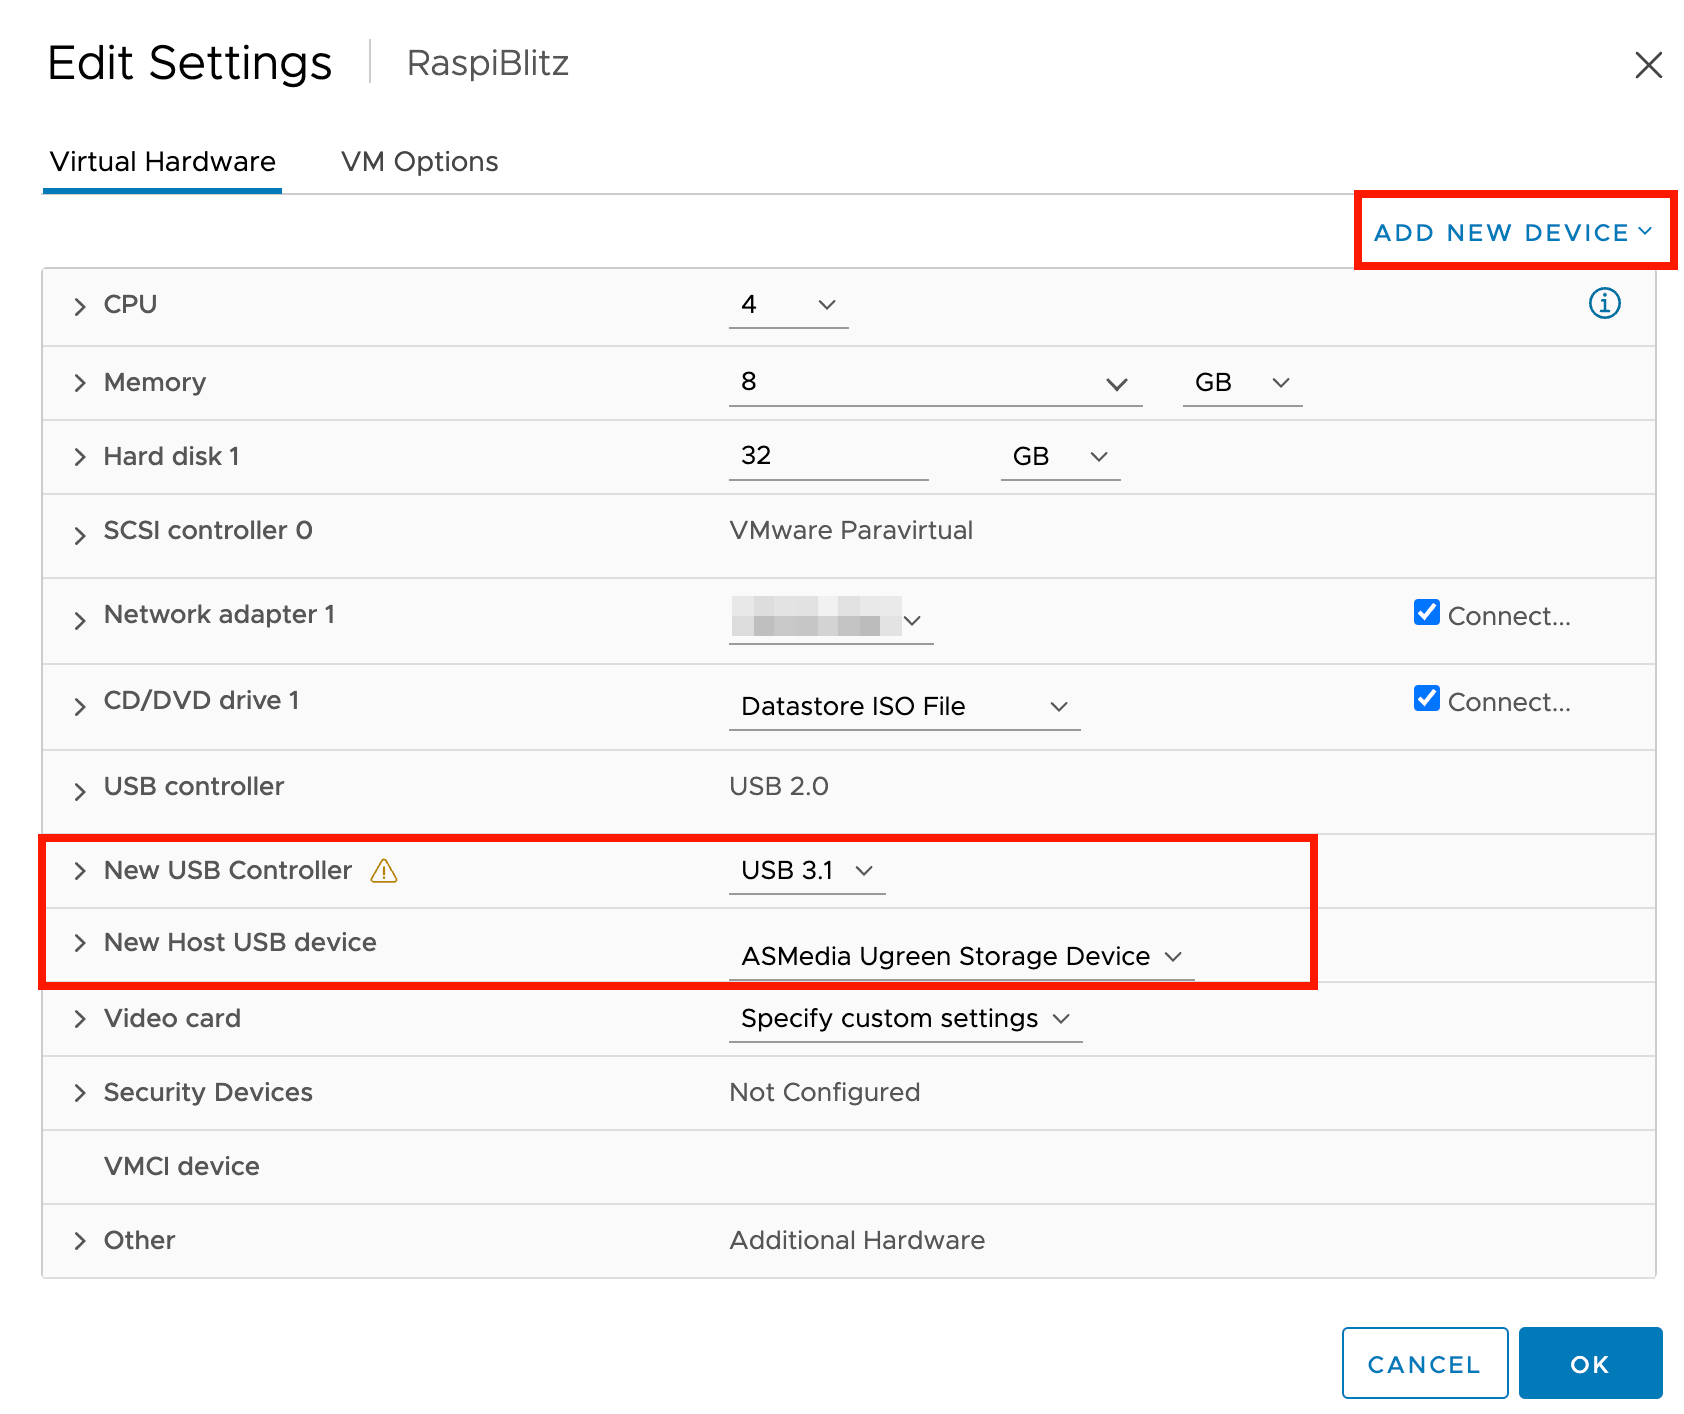
We now need to attach the SSD to the VM. Stop, the VM, edit the VM settings and add a new Host USB device. Make sure you select the correct hard disk, if you have multiple ones attached to the host. In my case, it’s ASMedia Ugreen.
If you’re using USB 3, you will also need to add a new USB Controller (e.g. USB 3.1).
At the next boot, install usbutils (using apt-get install usbutils). You now should see your SSD.
john@raspiblitz:~$ su -
Password:
root@raspiblitz:~# lsusb
Bus 004 Device 002: ID 174c:225c ASMedia Technology Inc. Ugreen Storage Device
Bus 004 Device 001: ID 1d6b:0003 Linux Foundation 3.0 root hub
Bus 003 Device 002: ID 0e0f:0003 VMware, Inc. Virtual Mouse
Bus 003 Device 001: ID 1d6b:0002 Linux Foundation 2.0 root hub
Bus 001 Device 001: ID 1d6b:0002 Linux Foundation 2.0 root hub
Bus 002 Device 002: ID 0e0f:0002 VMware, Inc. Virtual USB Hub
Bus 002 Device 001: ID 1d6b:0001 Linux Foundation 1.1 root hub
root@raspiblitz:~# fdisk -l
Disk /dev/sda: 32 GiB, 34359738368 bytes, 67108864 sectors
Disk model: Virtual disk
Units: sectors of 1 * 512 = 512 bytes
Sector size (logical/physical): 512 bytes / 512 bytes
I/O size (minimum/optimal): 512 bytes / 512 bytes
Disklabel type: dos
Disk identifier: 0x1dd0551f

Device     Boot    Start      End  Sectors  Size Id Type
/dev/sda1  *        2048 65107967 65105920   31G 83 Linux
/dev/sda2       65110014 67106815  1996802  975M  5 Extended
/dev/sda5       65110016 67106815  1996800  975M 82 Linux swap / Solaris


Disk /dev/sdb: 931.51 GiB, 1000204886016 bytes, 1953525168 sectors
Disk model: SSD PLUS 1000GB
Units: sectors of 1 * 512 = 512 bytes
Sector size (logical/physical): 512 bytes / 512 bytes
I/O size (minimum/optimal): 512 bytes / 512 bytes
Disklabel type: gpt
Disk identifier: 244C45B5-02FA-4993-AAA0-32C9E0DEBC88

Device     Start        End    Sectors   Size Type
/dev/sdb1   2048 1953523711 1953521664 931.5G Linux filesystem
We see that the SSD is our second disk /dev/sdb1. Create a new mount point and mount the SSD:
root@raspiblitz:~# mkdir -p /mnt/hdd
root@raspiblitz:~# mount /dev/sdb1 /mnt/hdd/
If you encounter an error while mounting, like
root@raspiblitz:~# mount /dev/sdb1 /mnt/hdd/
mount: /mnt/hdd: wrong fs type, bad option, bad superblock on /dev/sdb1, missing codepage or helper program, or other error.
try to repair the disk with fsck /dev/sdb1. Remember: you still have your RaspiBlitz backup file, that means you should be save no matter what happens to the disk. If the drive is not repairable or you just want to start fresh, format the disk and mount it. In every way, you will need to resync the blockchain if you don’t want or cannot import it from another RaspiBlitz. My recommendation: start a fresh sync.
Now, update and upgrade packages:
root@raspiblitz:~# apt-get update
root@raspiblitz:~# apt-get upgrade -y
Download the install script. At the time of this writing, the current version was v1.8.
root@raspiblitz:~# wget https://raw.githubusercontent.com/rootzoll/raspiblitz/v1.8/build_sdcard.sh
root@raspiblitz:~# bash build_sdcard.sh
You will have to accept the initial parameters to start the script. You’re done and have to reboot when you see:
# OK - a restart is needed: sudo shutdown -r now
# BUILD DONE - see above
Now, we can login via SSH using user admin and password raspiblitz.
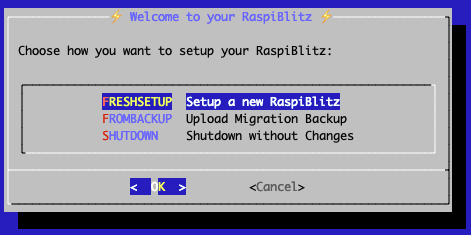
Choose FROMBACKUP and acknowledge to delete all data from the SSD. We now need to upload our migration file.
*****************************
* UPLOAD THE MIGRATION FILE *
*****************************
If you have a migration file on your laptop you can now
upload it and restore on the new HDD/SSD.

ON YOUR LAPTOP open a new terminal and change into
the directory where your migration file is and
COPY, PASTE AND EXECUTE THE FOLLOWING COMMAND:
scp -r ./raspiblitz-*.tar.gz bitcoin@10.0.0.100:/home/bitcoin/temp/upload/

Use password 'raspiblitz' to authenticate file transfer.
PRESS ENTER when upload is done.
Continue with the default RaspiBlitz setup process. At the end, you need to resync the blockchain or import it from another RaspiBlitz.
***********************************************************
RaspiBlitz going to reboot
***********************************************************
This is the final setup reboot - you will get disconnected.
SSH again into system after restart.
Use your password A
***********************************************************
You’re done, both passwords and app data should be migrated. Wait until the blockchain has synced and you’re good to go.